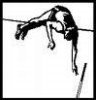
KirkB wrote:I love frames #5 and #6 (shown in PVStudent's posts above) of Lavillenie's 6.01m vault!
This "C" position is why he's the WR now!
Say what you will about his technique after the C (with distinct differences from SB), but if you can't get to the C (as he has), then if you want to vault high, it doesn't matter what you do in subsequent parts of the vault. He makes it or breaks it by his speed down the runway, to the point of the C. His bottom arm is so high above his head at this point that any perceived or real "push" on the pole is quite immaterial.
It's all about getting to this C, then whipping out of it! And the "whipping out of it" is the continuous pull (from take-off to lift-off) that PVStudent mentioned (and I commented on) yesterday.
And say what you will about RL's technique vs. SB's, this "C" (and all the good body posture that goes along with it) is what they both have in common!
Whilst I agree with most of the above I do not accept "This "C" position is why he's the WR now!"
The take-off of both vaulters is indeed very similar.
Their "C - Position" is somewhat similar but the differences in the consequences of their movement into the "C" emphasizes that the links in the kinetic chain prior to and post the instant of take -off must be assessed in the causal chain.
How the "C" dynamics work as a link in the continuous chain of motion suggest, even when this is a very strong link, it is the Weakest Link in the "Whole Chain" that will be the key determinant of success or failure in any vault!
- Renaud Lavillenie pole support action sequence for 6.01m vault 2014 2.jpg (73.58 KiB) Viewed 21094 times
The drawing sequence above shows the pole support phases from take-off to final pole release.
http://youtu.be/ehtzp3OL0kg
The still frame images in Renaud Lavillenie's phase 1 of pole support taken from the exemplar video, shows in detail his movement through the "C position" into the positional configuration of his body at maximum moment of inertia about the top hand axis.
- Renaud Lavillenie pole support phase 1 take-off to maximum moment of inertia about top grip 1.jpg (96.51 KiB) Viewed 21094 times
- Renaud Lavillenie pole support phase 1 take-off to maximum moment of inertia about top grip 2.jpg (91.9 KiB) Viewed 21094 times
The video below shows that following take-off Bubka and Lavillenie do differ in their transfer of momentum technique in passing into and out of the "C" position, initiating their "Whip Swing" and swing follow through and in initiating inversion prior to pole recoil.
http://youtu.be/zqseTThPL5M
The "C - position" is a useful visual cue to the coach to indicate that the take-off has been effective. During the early part of phase 1 of pole support, observation of the "C" position should also assess the forward progression (run = horizontal penetration) is being maintained and that the pole bend is primarily forwards in the Sagittal Plane.
Any observation of the Vaulter and hand grips "sinking" ,at the end point in achieving the "C position" and as the leg swing initiates, is an indicator that the angular speed of pole chord rotation about the pole tip has been slowed using vaulter weight to increase pole bend. The consequences of this is increased potential for pole stall and or peak projection height being achieved well before the plane of the cross-bar is reached following pole release.
The next post will show how Lavillenie uses an entirely different inversion technique compared to Bubka.
 Keep up the good work!